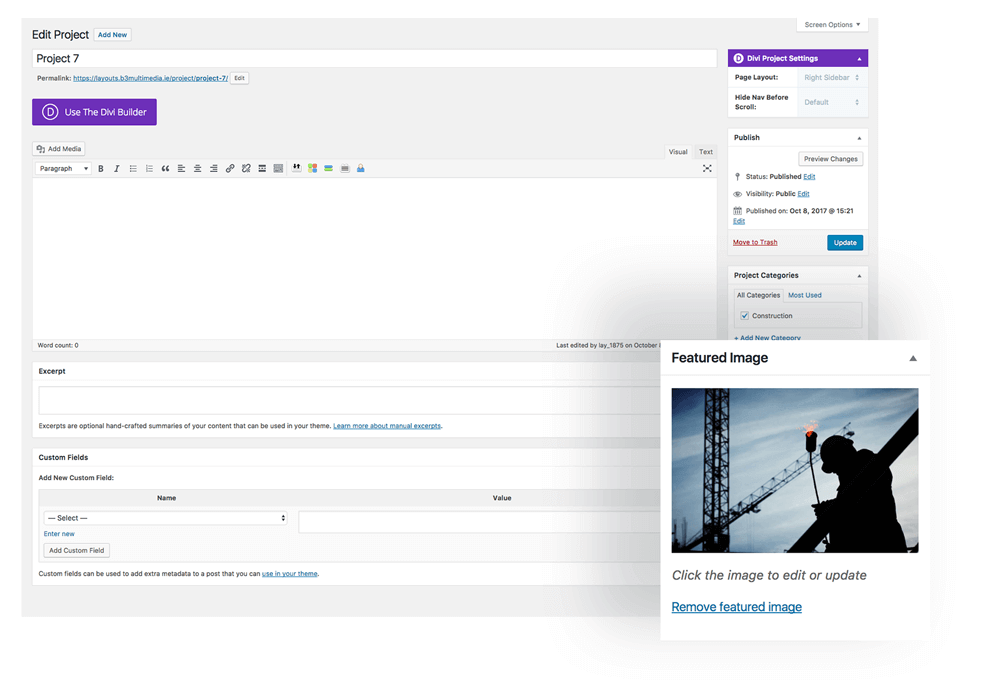
In today’s tutorial I will show you how to create a New Project for your Divi WordPress Site in a nice and clean way.
This post is meant for clients whose website is built on the Divi theme, to learn how to create new project if they want to do it themselves.

Create A New Project
The first thing we need to do is to add project items to our website so they will be displayed when we use the Portfolio module.
1. Log into your website to access the dashboard.
2. Go to Posts –> Add New
Add Title – This text will be the name of the post. It will also be used to generate the URL for the post.
Add Category – Open the Categories dropdown on the right. Use the checkboxes to select a category for the post. If none fit, a new category can be created here and assigned to the post.
Add Featured Image – This image should be a visual representation of your post. This image will be displayed on your Blog page and at the top of your blog post.
Add The Post Content – Click on the “Use Default Editor” button (to the right of the purple button). This will turn on the default WordPress editor. In this editor, you will add your content.
4. Click Publish


thank you